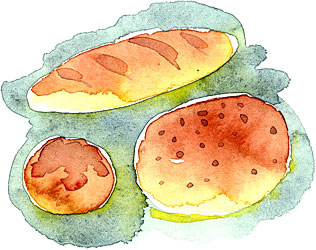
Baking Bread
Just the smell of
bread baking makes this project worth doing.
Objectives
Children between the ages of 3-5 years should be able to make
size comparisons Cog. IIIB
and use texture to describe objects Cog. I
Children ages 2 ½-3 can discriminate between hot and cold Lang. IIA
Children ages 2-3 can roll, pound, and squeeze the dough FM I
And children 2 and under can understand and follow simple directions Lang. IA
Materials
2 or 3 loaf packages
of frozen bread dough. Remove from freezer and put in refrigerator overnight,
dough will thaw out but will not rise. Flour; cooking oil; sugar; 1 package of
dry yeast; warm water; muffin tins; mixing bowls, eyedroppers, and a sharp knife.
Procedures
1. Pour yeast granules into bowl and pass around for children to
look at. Explain that yeast is really a kind of plant and given food and water
it will grow.
2. Help children mix up a sponge, following directions on yeast package. Pass
the warm water around and have the children check temperature by sprinkling a
few drops on their wrists—water should feel just warm, not hot or cold. Pour
the correct amount of water in with the yeast, stir gently, and add flour and
sugar. During this process, discuss the conditions needed for yeast to grow—warmth,
water, food (flour and sugar) and that yeast, like all plants and animals will
breathe as it grows. As the yeast grows and breathes, bubbles will form in the
dough making it look bigger. Encourage kids to smell the sponge as it is mixed.
3. Put the sponge aside to rise. Pass around a bowl of flour and let each child
take a handful to flour hands and table tops. While children are taking flour,
cut each loaf of bread dough into 10 or 12 pieces. Give each child a piece of
dough and point out the air pockets and review the functions of the yeast.
4. Show the children how to roll the dough into a ball. Discuss the temperature
of the dough—it will still be cold. Remind children that yeast needs to be warm
in order to grow well, encourage the children to warm the dough by rolling it
in their hands.
5. Let children play with the dough. It turns out OK anyways. When a child
thinks his roll is sufficiently warm and round, let him place it in a muffin
tin. Describe the size—does it fill the muffin tin well?
6. When the muffin tins are filled, cover them with a damp cloth and put aside
in a warm place to rise.
7. Check the sponge. Is it bigger? Let the children push their fingers into it.
“Look at the bubbles”. Describe the next steps in making bread with the sponge
(if time allows and interest continues, make more bread!)
8. In half an hour or so, gather some of the bakers to check on the rolls.
Before removing the cloth, ask children to guess why there are “mounds” under
the cloth. When the rolls are about double in size, put them in the oven at 350
degrees and bake. Smell the rolls as they bake. (Do they still smell like the
yeast? Better?)
9. Serve rolls for snack while still warm (butter, honey, optional).

Variations
1.
Instead
of making rolls, let kids make letters (a la pretzels) or other things with the
dough. Bake on cookie sheet. The change in size and shape as the dough
rises is more dramatic.
2.
See:
COOKING – “Making Butter.” Make butter while the rolls are rising and baking,
and serve the butter on the rolls.
3.
Cheese
Pretzels: Make the sponge (Step 2, procedure) using the following proportions:
1 pkg. yeast
¼ cup warm water
Pinch of salt 1 tsp. sugar
1 cup flower
After the project, refrigerate the sponge for
use the following day.
(Freeze if saving for several days.)
Making Pretzels:
1) Grate ¼ cup cheese
2) Beat one egg and set
aside
3) Knead cheese into
dough. 4) Divide dough into 8-10 pieces. Let children roll dough into long pieces and form letters pretzel shapes, whatever.
5) Brush with beaten egg.
6) Sprinkle with coarse salt. 7) Bake at 425 degrees for 10 minutes.
|